 2
2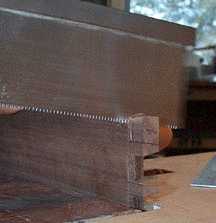 3
3
123
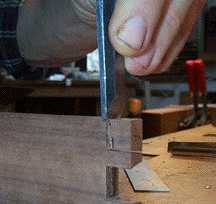
1: The pins are all laid out, sawn and chopped. Here the shoulder is incised with a sharp chisel to ensure a good clean tight fit.
2: The shoulders are sawn close to the line. Then they are pared with a chisel to the line.
3: Then the marking of the tails is next. The same as before, the marks are transferred directly from the pins. Note the block to ensure a flush alignment along the bottom edge. All of the sawing, chopping and paring is then done exactly as before.
 2
2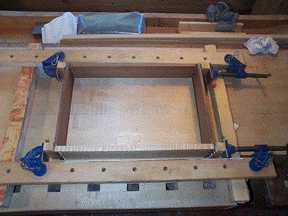
1: Preparation for glue-up begins once all the joints are well fit, and the drawer back is trimmed to allow the bottom to be fit later. Making clamping blocks especially for this purpose ensures that clamping pressure goes exactly where you want it.
2: The glue assembly is done with the slow, steady, controlled force of small bar clamps

23
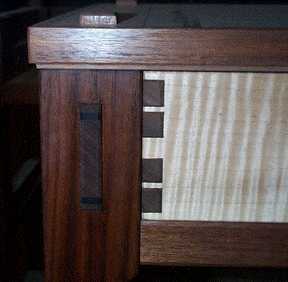
1: Most of the fitting is all done before the bottoms go in. A sharp plane is used to take very fine shavings, carefully checking the fit.
2 & 3: Well fit drawers. A small amount of tweaking will be done after the top is glued in place. Most of the time, drawers are fit into spaces that are already completely enclosed. In this case I had the luxury of being able to do much of the fitting before that stage.

